
This left me looking for something else to step in as our Swiss Army knife that could help satisfy random functional requirements. After some googling and unsuccessful attempts with other modules I stumbled upon Business Rules. While still a fairly young module, it is already quite powerful and stable. To put it through its paces, I set out to try building a couple of rules in Drupal 8 that we used often in 7.
Although the workflow is a little different than you may be used to in Rules the concepts and language are pretty much the same. At its’ core you have “Rules” that are the events that will trigger “Actions” when a specific set of “Conditions” and contexts are met. At any point in the process we can use “Variables” to dynamically add values to separate components of the rule.
Unlike Rules, this module uses different sets of reusable configuration that you can mix and match to create your rule. Here’s a list and a brief rundown of the various parts.
Rule - Rules are the event types, this is where you’ll choose what you want to react on and bring all your other pieces of config together to trigger the desired action.
Condition - Conditions are used to evaluate an expression such as a data comparison, logical AND/OR, etc.
Action - Actions are where you’ll execute your desired functionality, actions can be placed within other actions or be part of conditions or rules.
Variable - Variables store values for use within conditions and actions and can act as tokens to load in dynamic content where it is needed.
If you’re a little confused by any of those descriptions I’ve created a little tutorial based on a rule we have used often in the past. It takes advantage of some neat functionality within the module to achieve the end result.
Tutorial time!
What we’re going to do is create a rule that upon saving a new node of type “Page” it will send out a notification email to all users of a specified role. This is something that was a fairly simple action that could be fulfilled easily with Rules in D7 but is currently absent in the D8 variant without the use of a bunch of patches, one of which unfortunately is to core. You will notice though, that how we’re going to build it using Business Rules opens up the ability to create a list of email recipients from any arbitrary set of filters rather than just role.
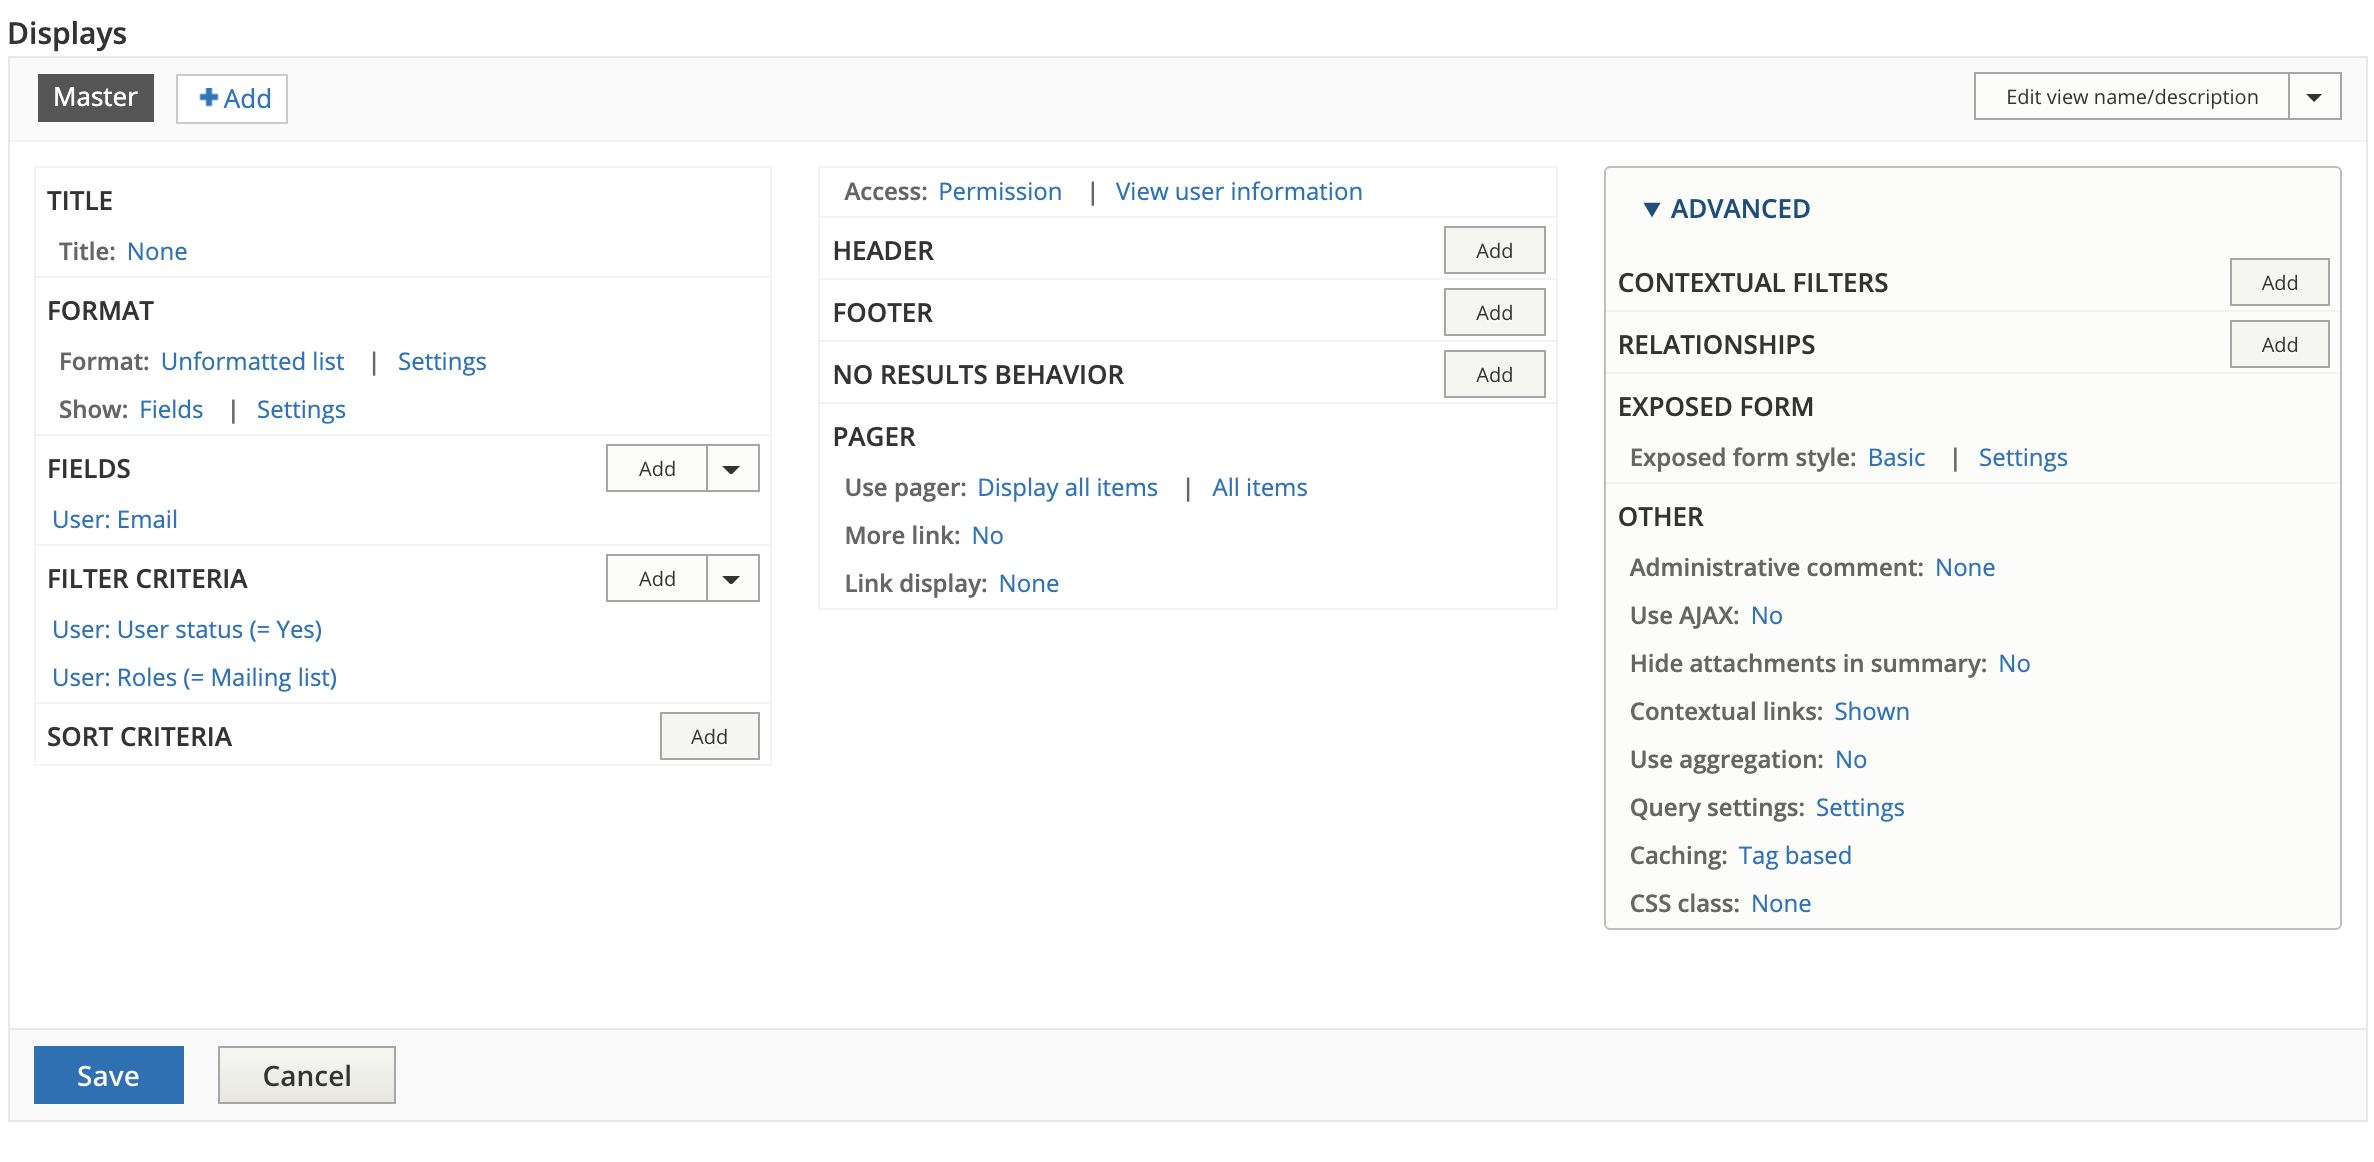
So I’m going to build this in a way that might seem a little out of order if you’re used to the Rules workflow. Trust me, it’ll make sense when it starts to come together. First we’re going to start by building a simple view. Select show “Users” and click save and edit. The only thing you’ll want to do is change the pager settings to “display all items” and add the filter “user:roles” filtered to the role you’d like to send the email to. You’ll then add “user:mail” as the only field, click save and you’re done with views config!
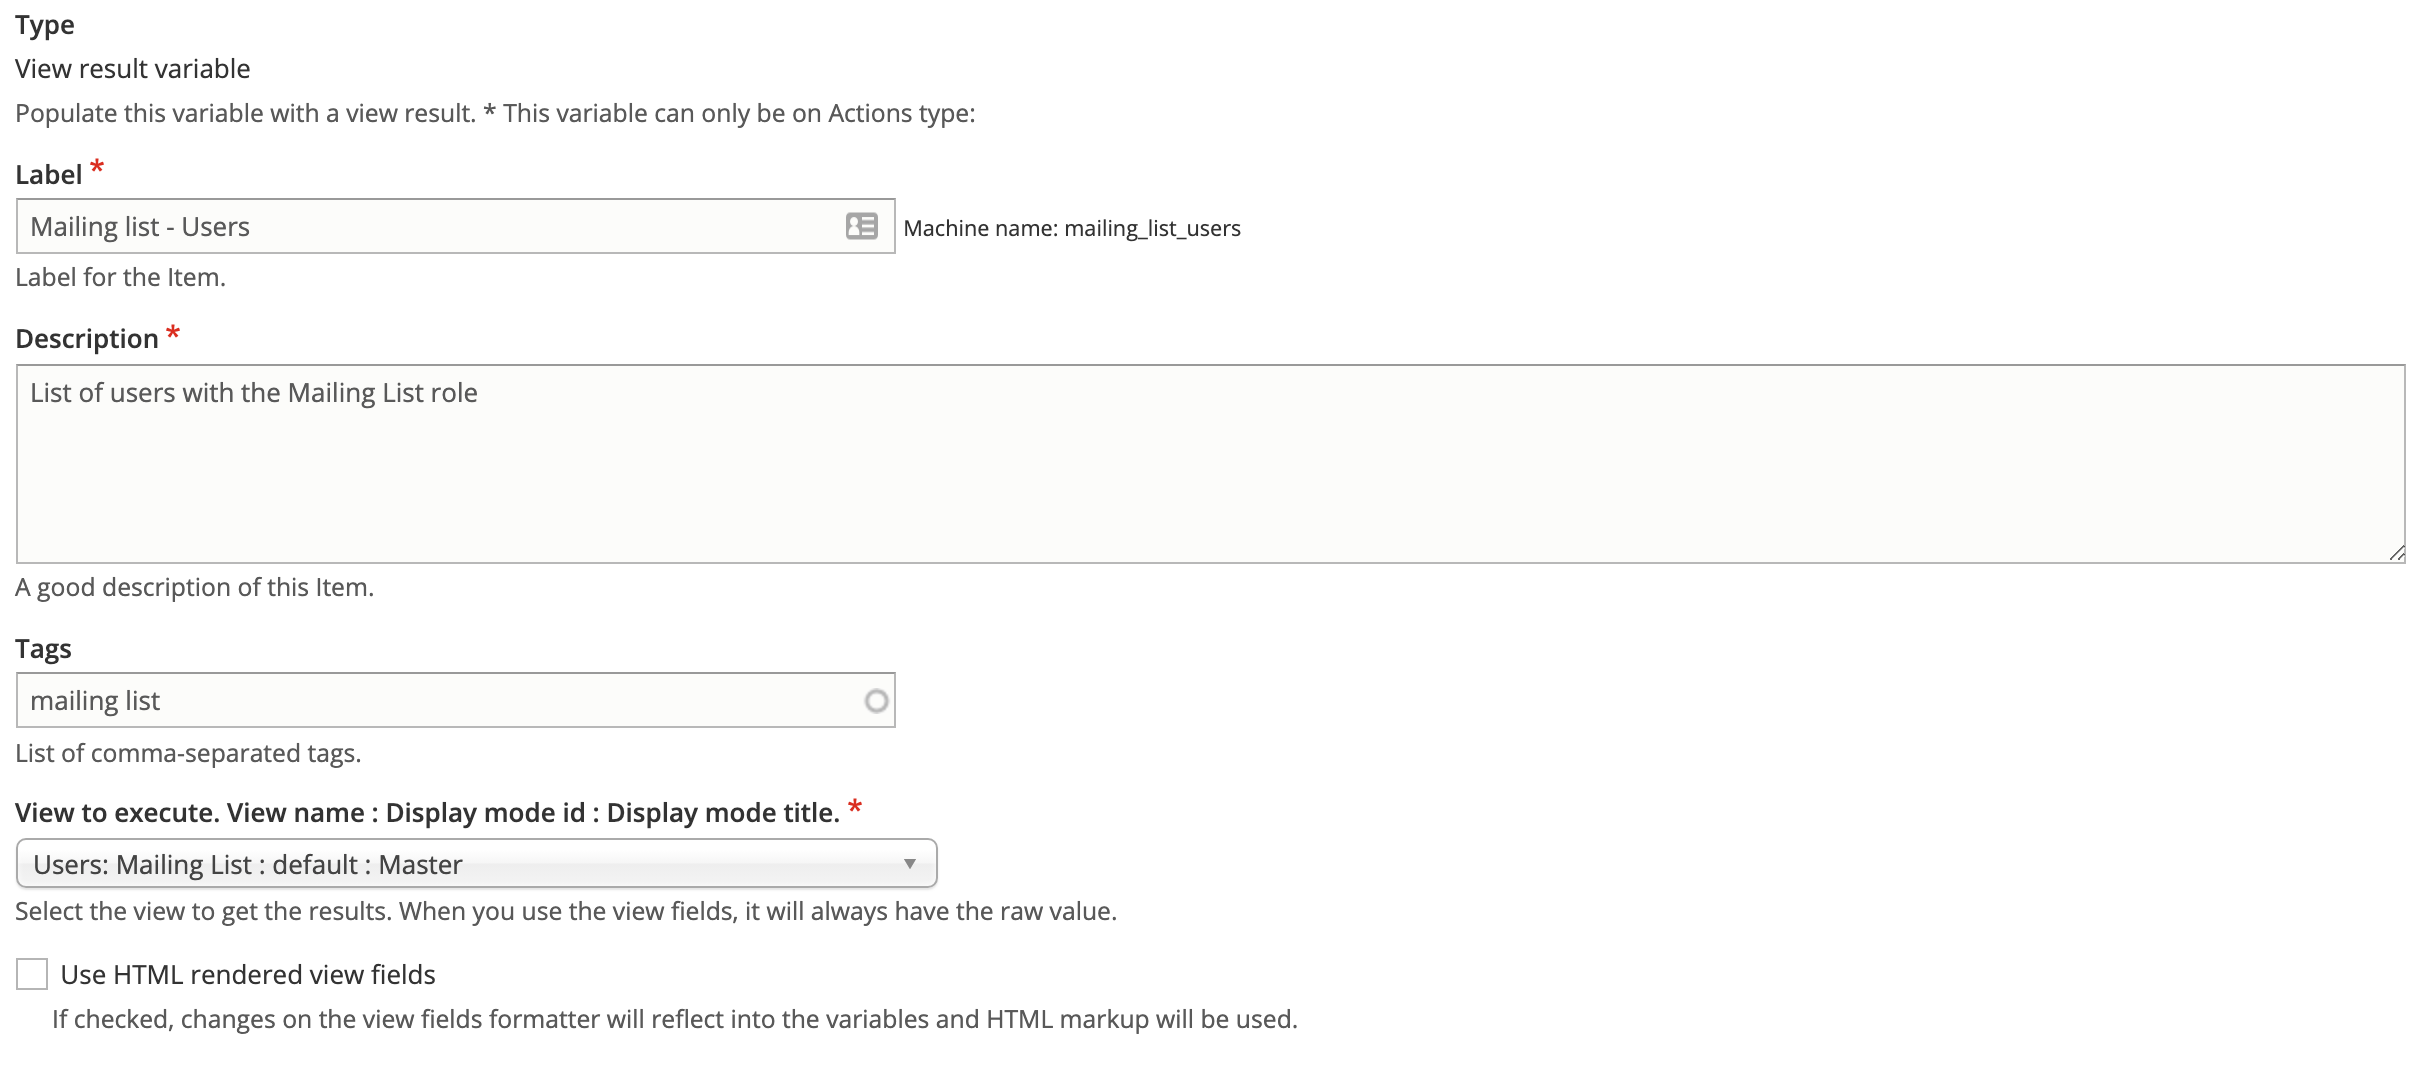
Now that we’ve created the source of our user list we’ll head over to /admin/config/workflow/business_rules/collection First thing we’ll do in here is click the “Variables” tab and add a new variable. The type will be “View result variable” click continue and give it a label, description and select the view we just created.

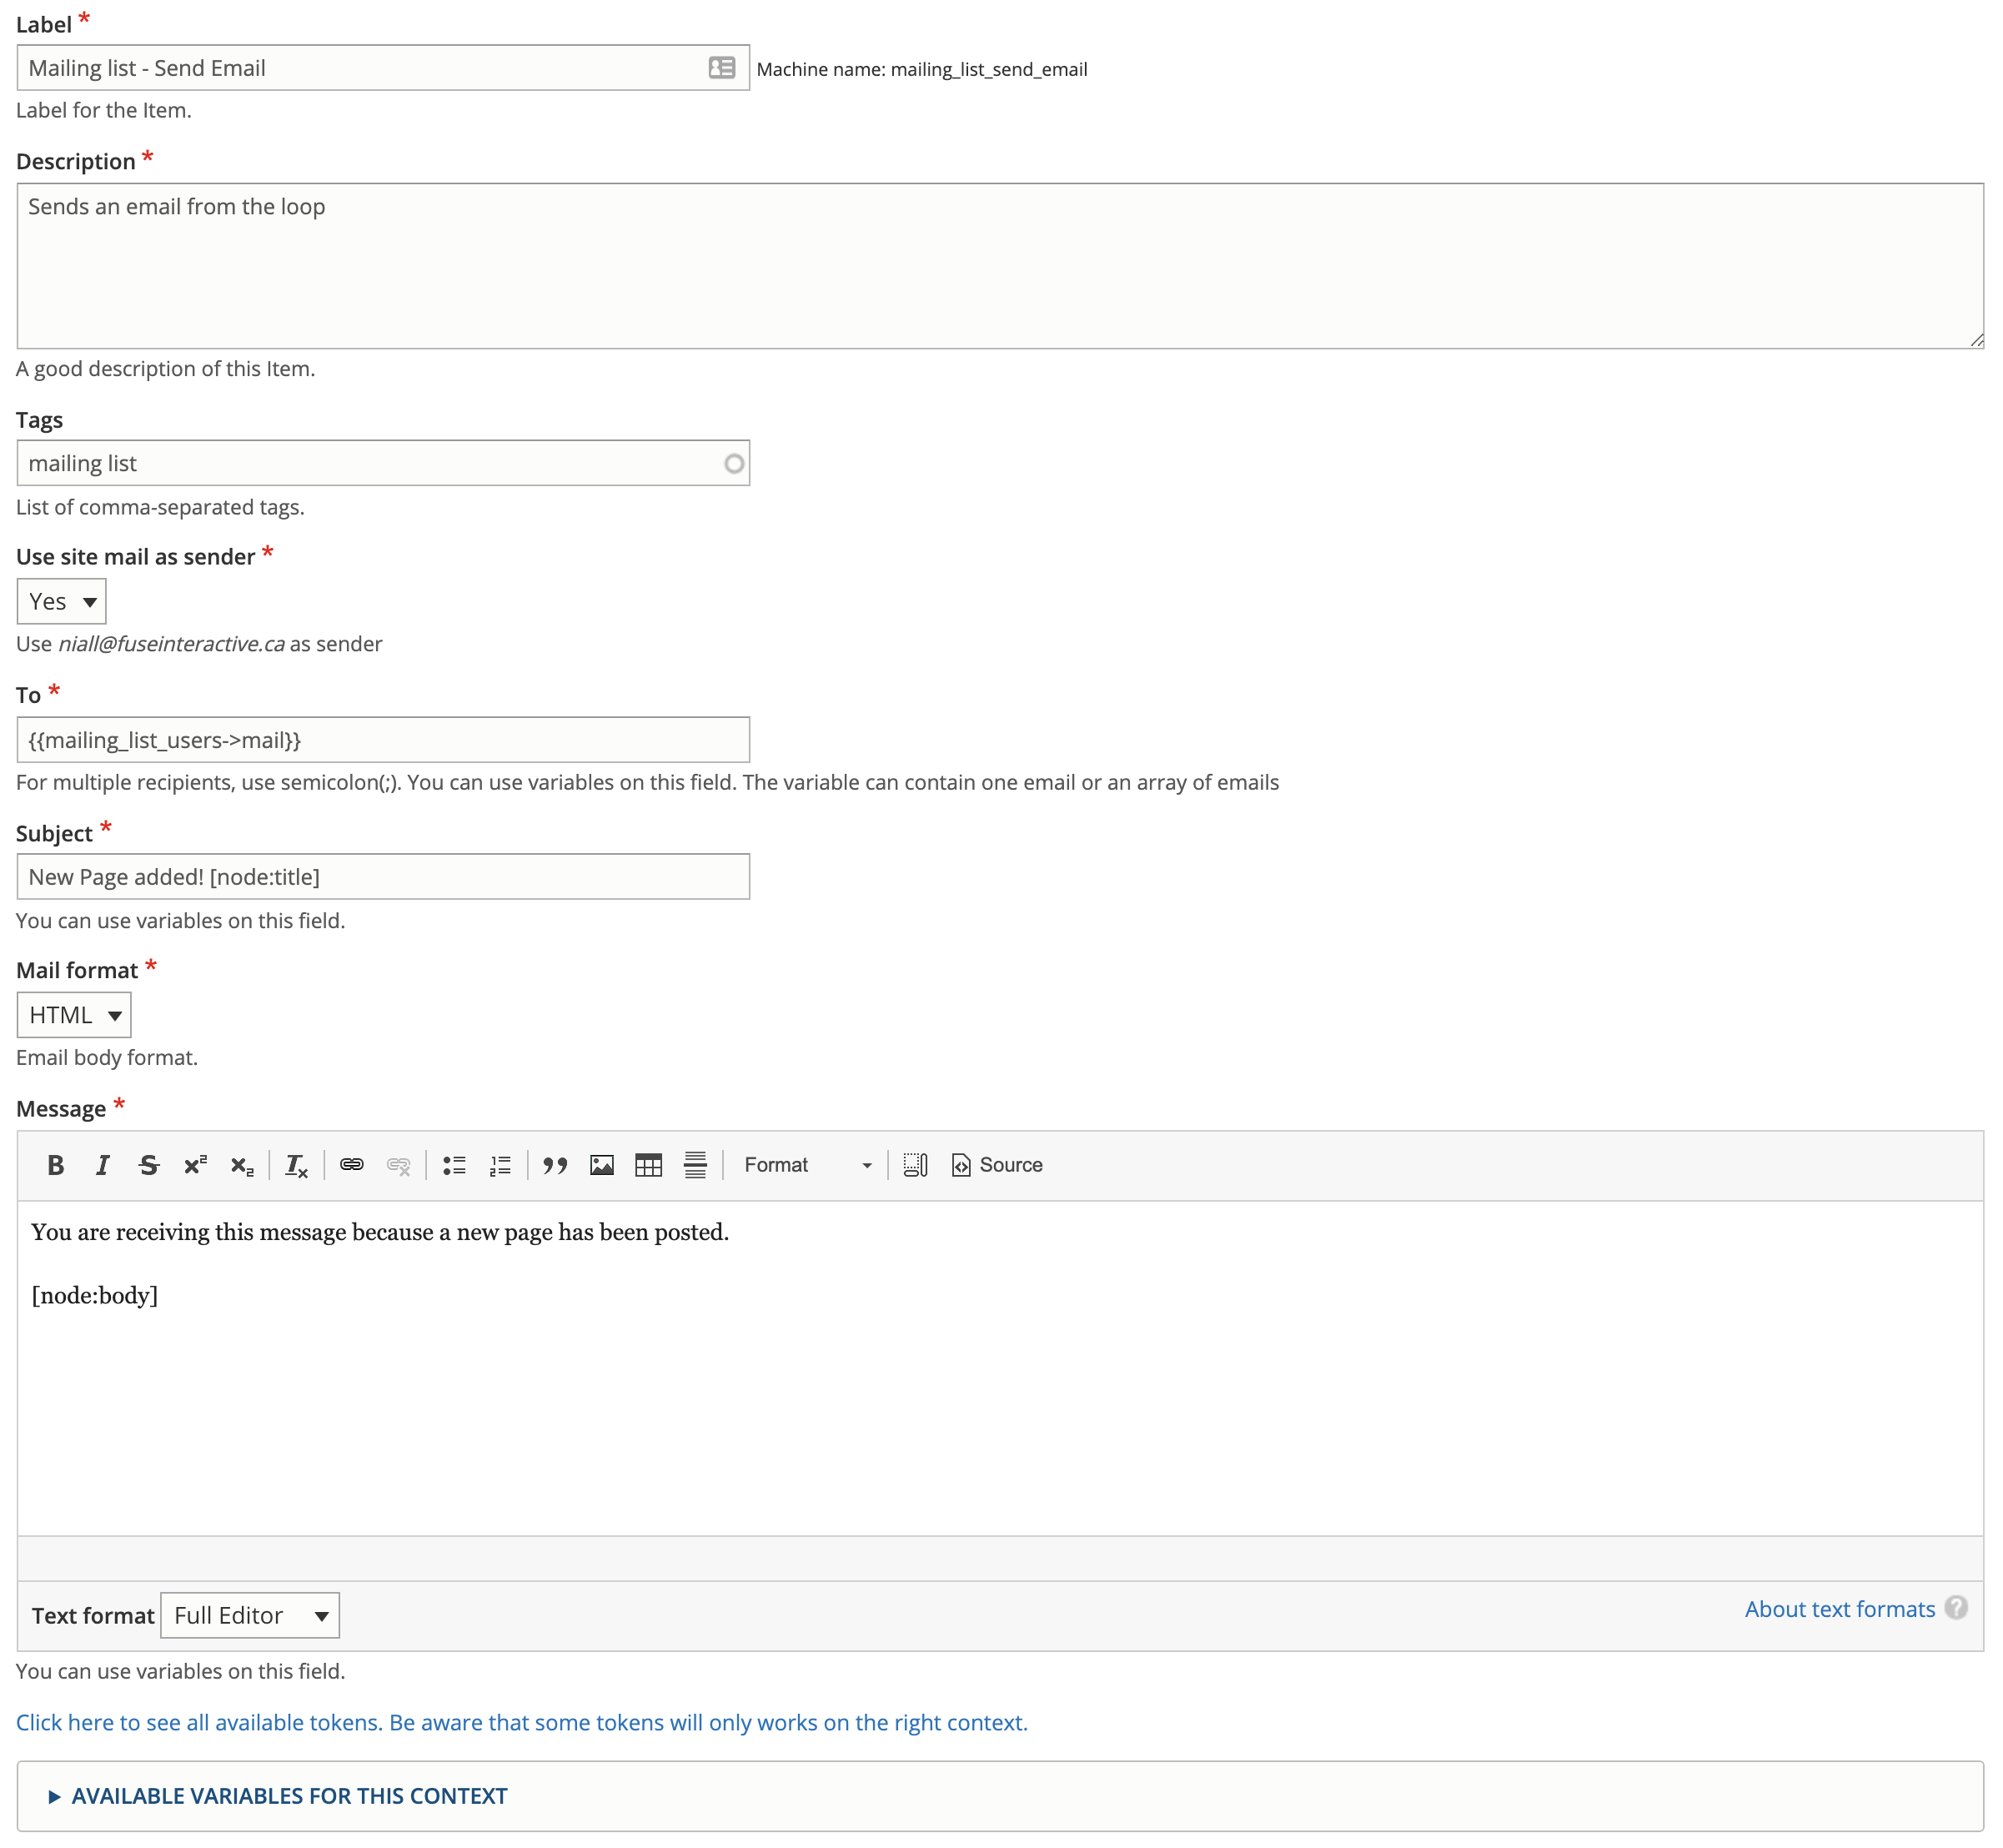
Now that we have our variable setup we can start creating some actions. First we’re going to work a bit backwards and create the send mail action. Click over to the “Actions” tab and add a new action, select type “Send email” and click continue. Most of this form is fairly straightforward, add a label and description. When you get to the “To” field you’ll want to scroll down to the “Available Variable for This Context” fieldset and find the variable you setup. There will be a link that says “click here to see the view fields”, click that and grab the token for the “user:mail” field you setup earlier. Pop that token into the “To” field, fill out a subject and body and you should be good to save.

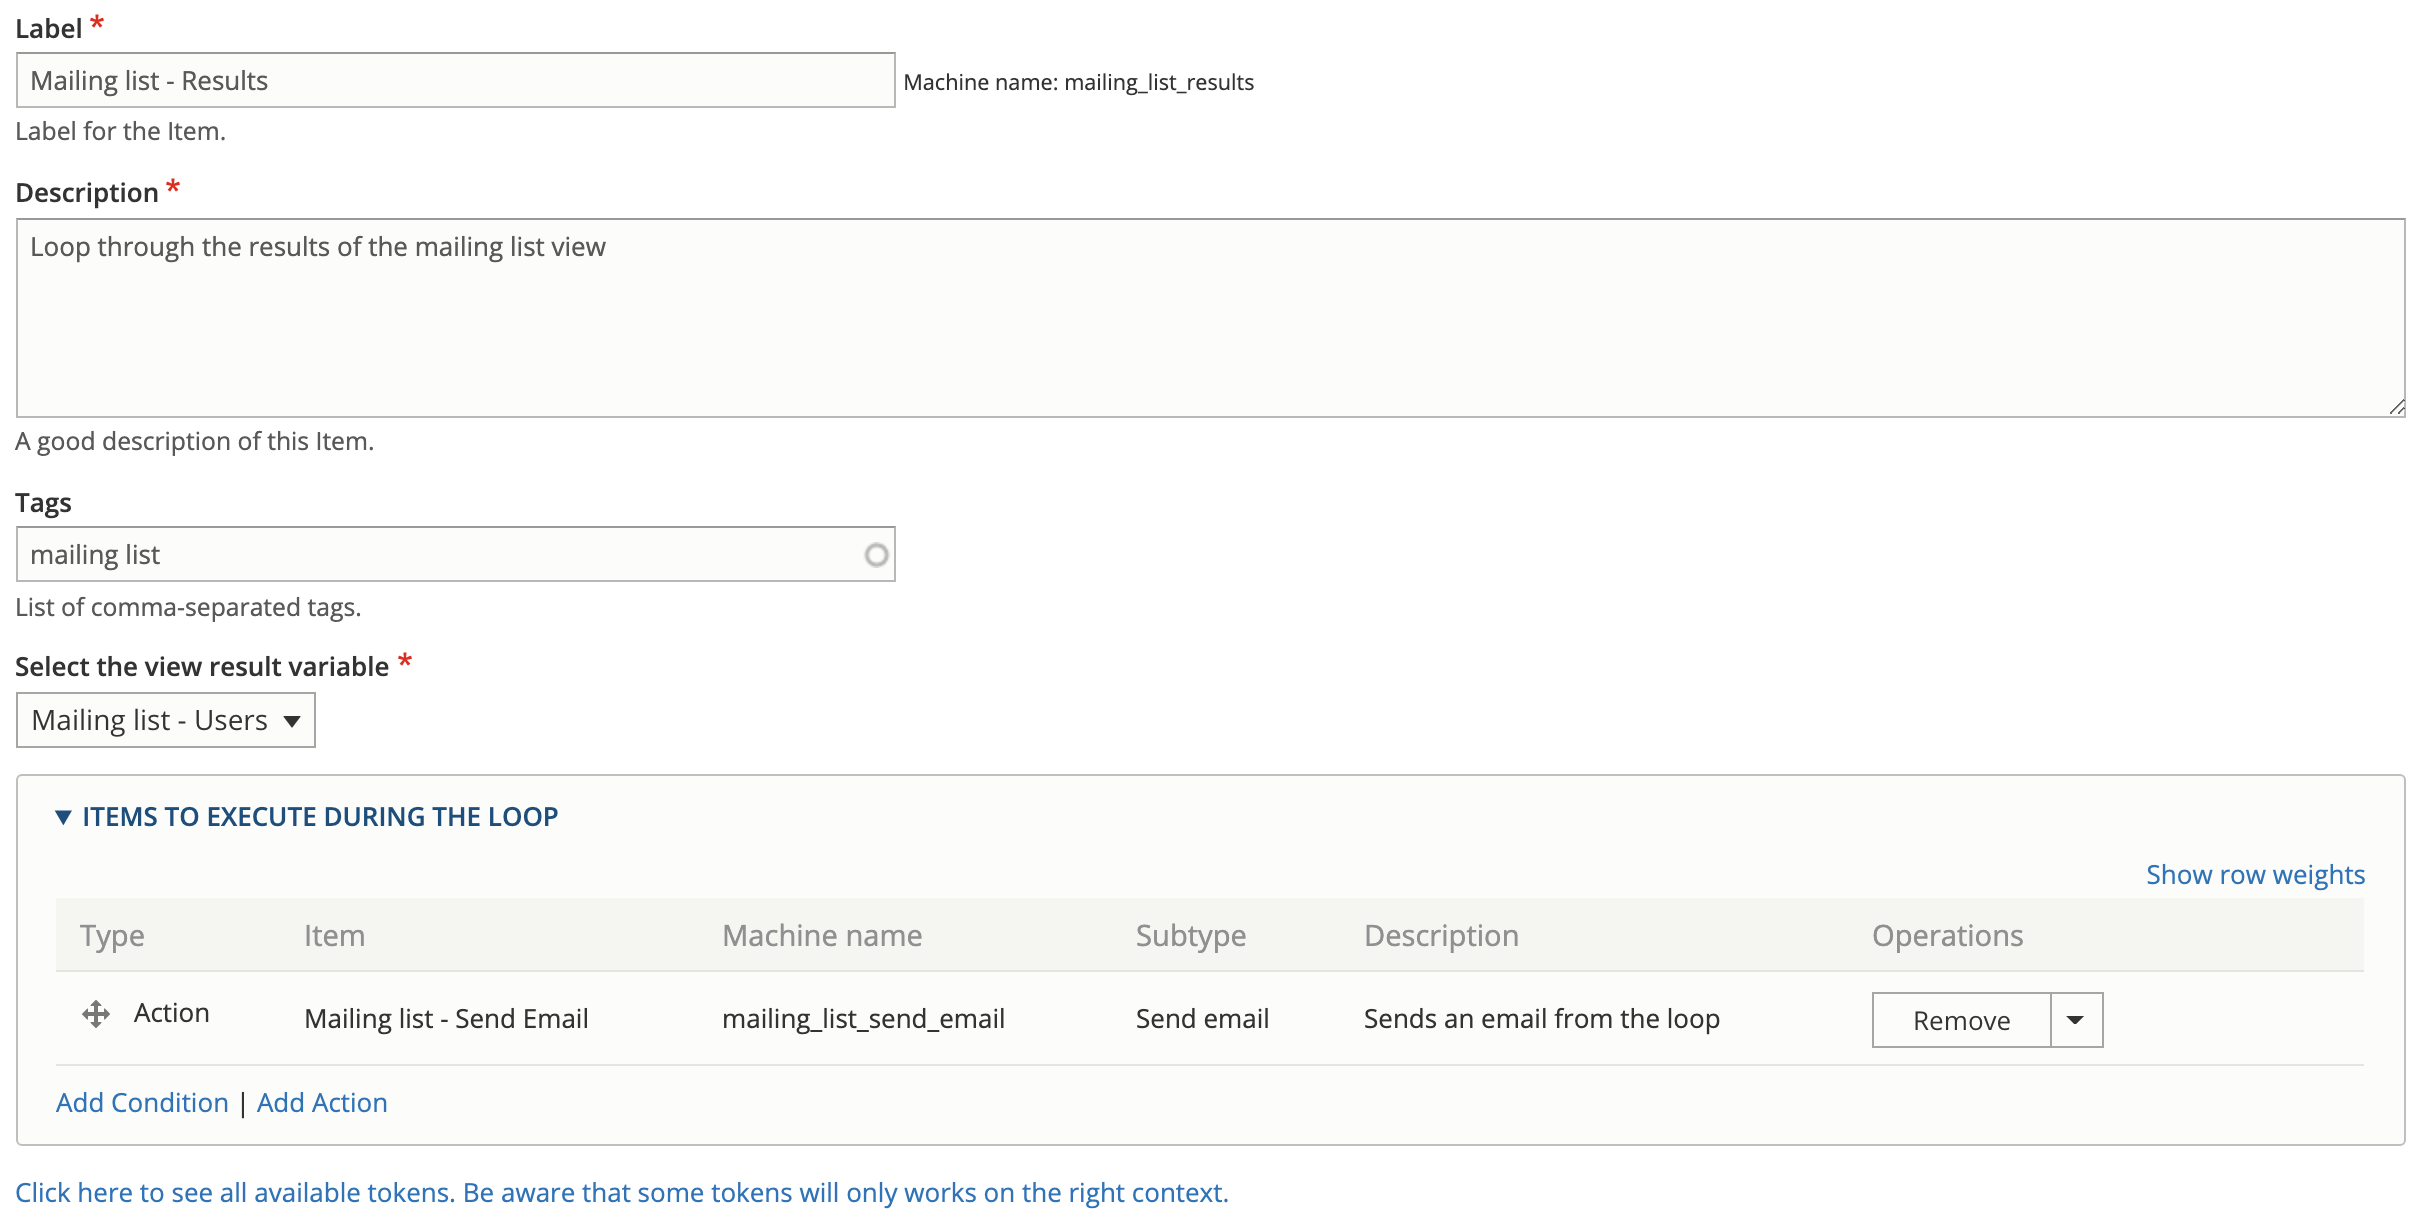
Next we’ll create another action this is where it gets fun, we’re going create and action that will loop through our views variable and perform our send mail action for each result. Click “add action” and choose “Loop through a view result variable” and click continue. On the next page select the variable you setup and then under “Items to execute during the loop” click “add action”. Here we will add our send email action we setup earlier and save. Now we’ve created an action that will loop through our user list and perform our send mail action on each result.

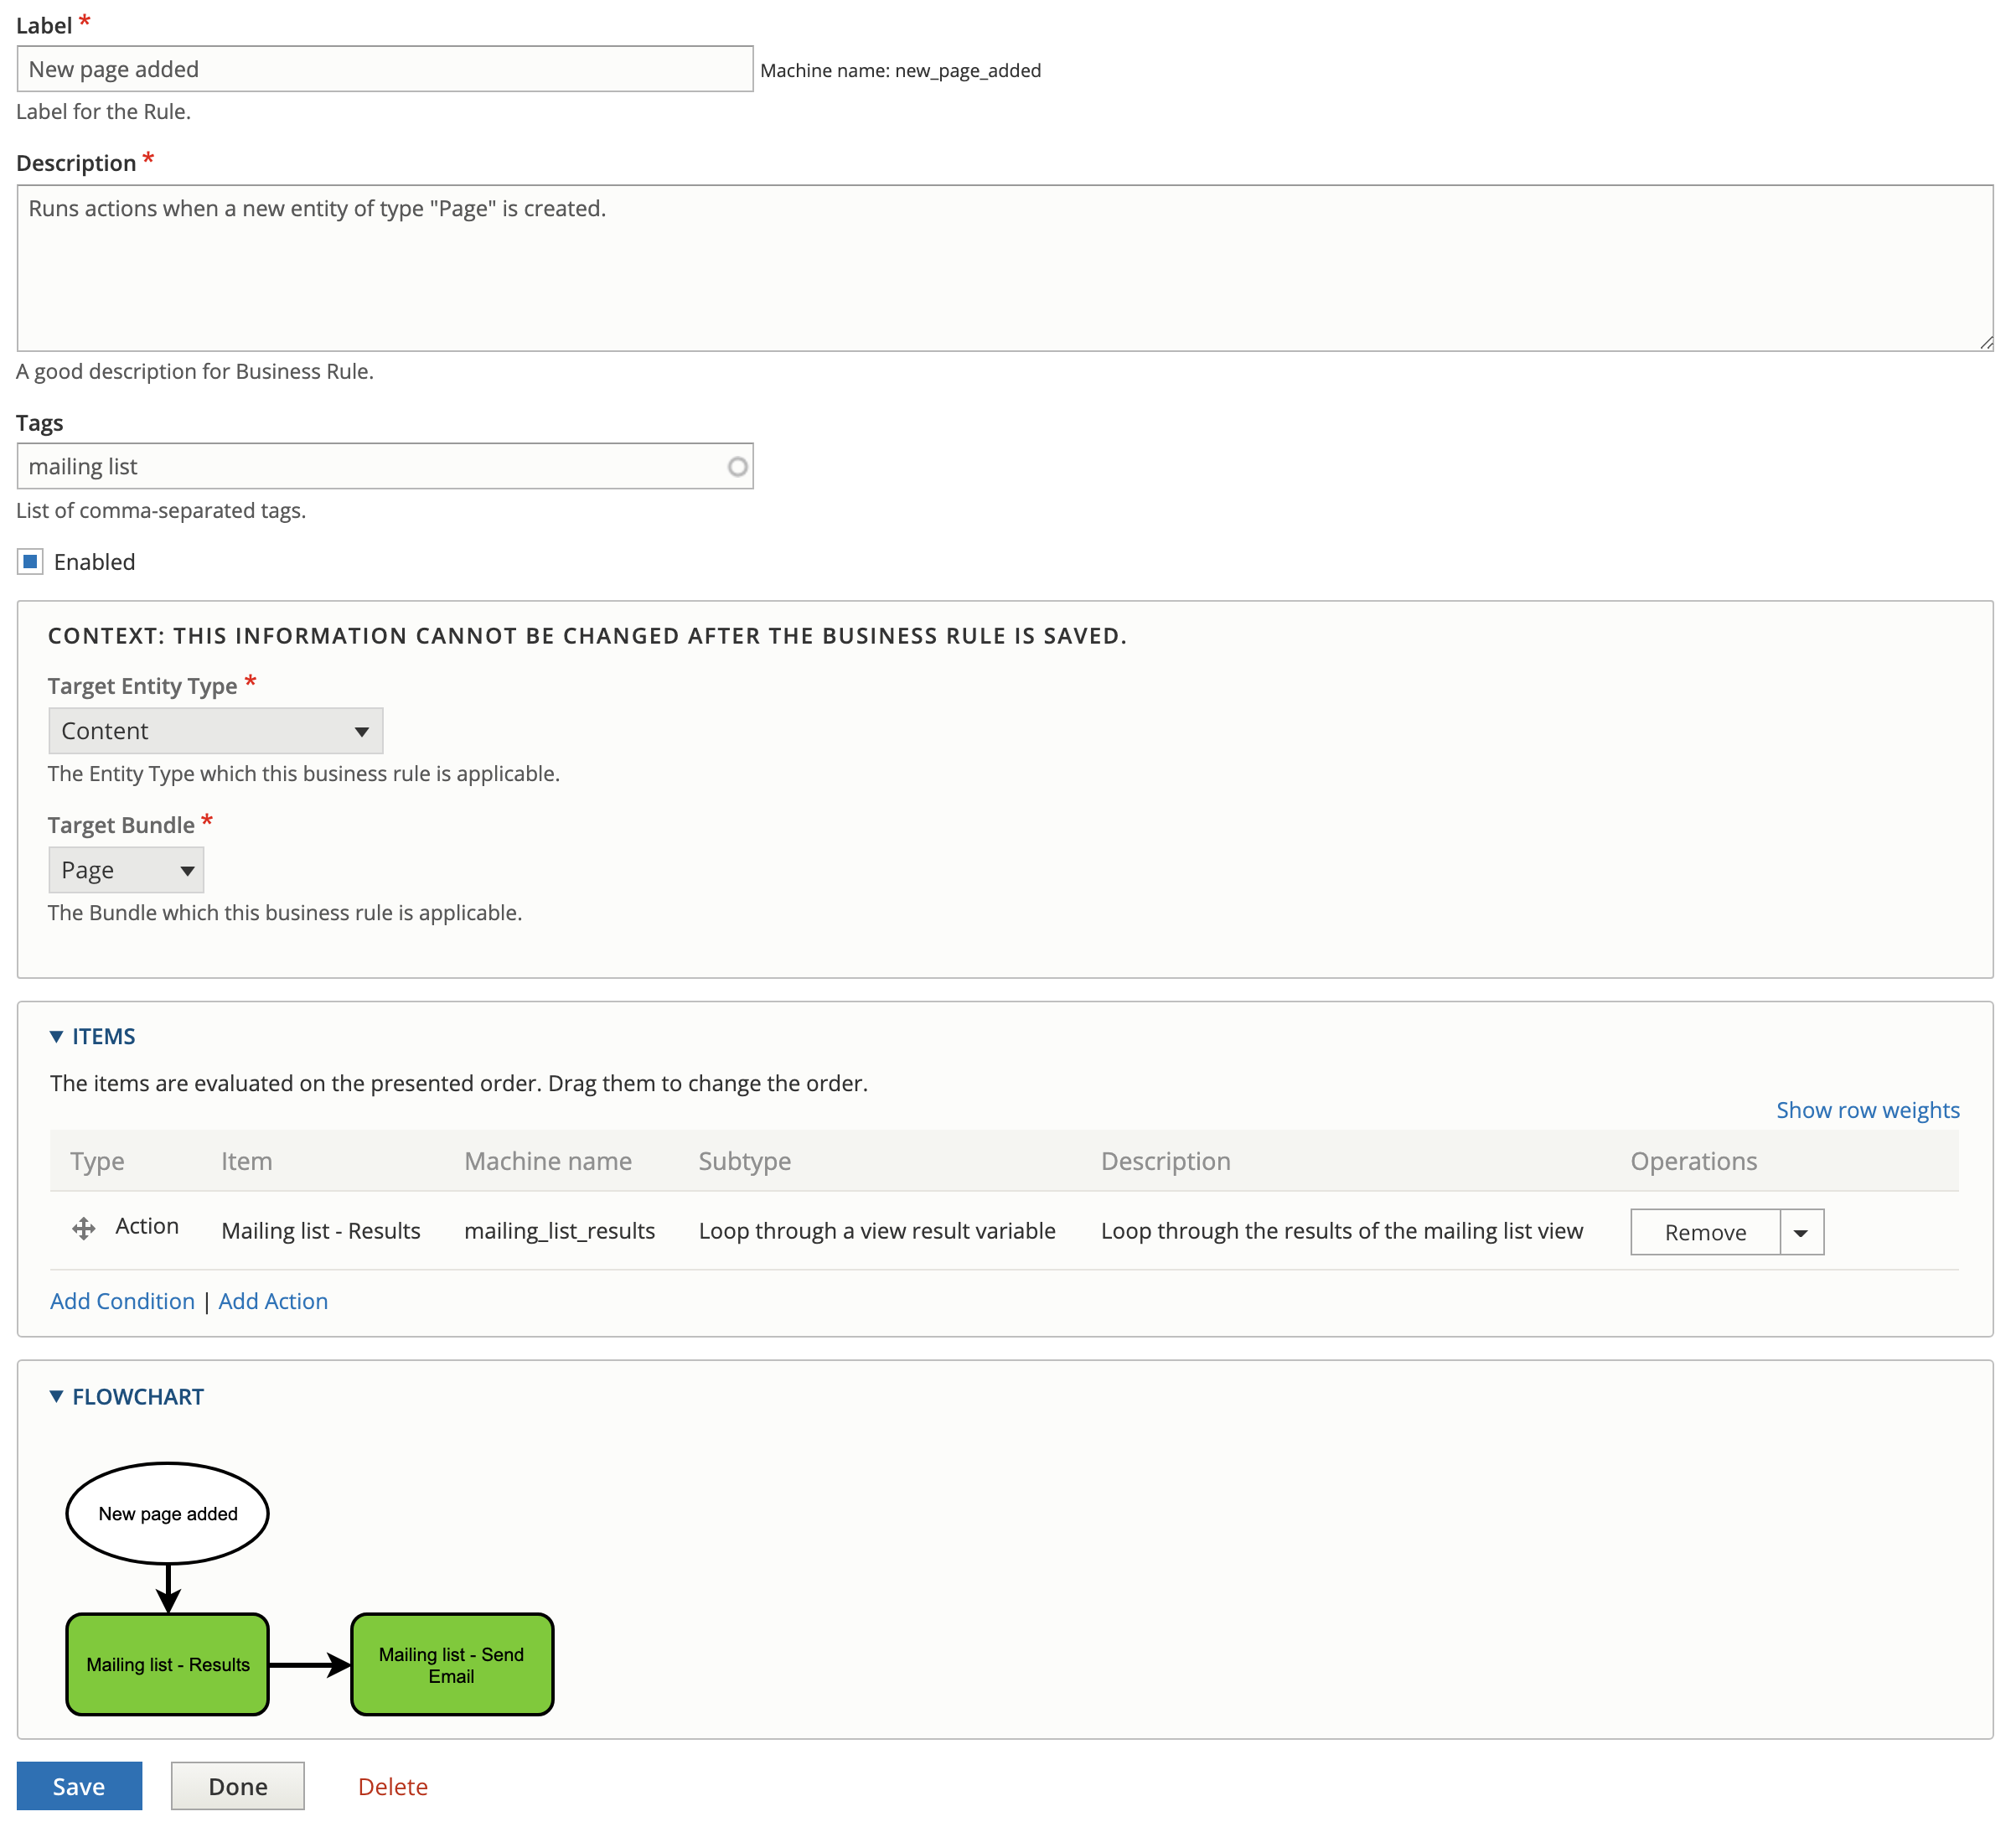
The last bit of config to tie this all together will be our rule, so head over to the “Rules” tab and click “add rule”. We’ll select “Entity insert’ for our “reacts on event” and continue. Fill out the usual fields and select “Content” for “Target entity type” and select your desired content type for “Target bundle”. We’ll then add our loop action we just completed under the “Items” fieldset. We now have a fully functioning rule and as a bonus we get a nifty flowchart at the bottom so we can visualize the order of operations.

This just scratches the surface of what can be achieved with the module, more custom variables can be created to grab content from the node for use in the email body and logic statements and data comparisons can be used to run multiple branching actions on one event. So far everything I’ve tried to create has worked exactly how i was expecting it to. It’s a worthy replacement for rules which seems to have fizzled out at the moment. I’m looking forward to seeing what we’ll be able to do with it in the future, so get in there, try it out and help get it to it’s 1.0 release.