
Over the course of last few projects we had to incorporate a content slider in one way or another. This method of highlighting parts of the site's content has become increasingly popular, partly due to being used on popular sites like cnn.com.
When it comes to Drupal and slider (or rotator) modules, there's abundance of choice. Today we'll look into Views Slideshow, one a few slider modules that's being actively developed for the current version of Drupal and the upcoming Drupal 7.
Let's look at some of Views Slideshow potential uses:
- Latest news
- Featured photos or videos
- Products on sale
Since the module utilizes the flexible Views the possibilities for content combination are pretty much endless.
The solution helps to save space and capture user's attention. If it sounds like something you would use, read on!
Creating slides using Drupal's Views Slideshow
1. Get necessary modules
Drupal modules are often dependant on other projects, and Views Slideshow is not an exception. Download and install the following modules. Chances are you already have some enabled.
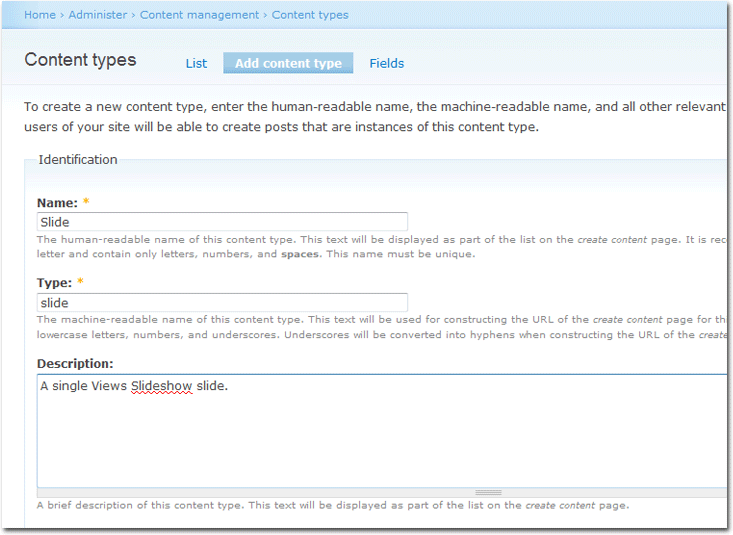
2. Create a new content type 'slide'
Now we're going to create a new content type that would allow users to upload new images. The files will be then resized, if needed, and finally used in the rotation.
Navigate to Administer ⺠Content management ⺠Content types and click on the "Add content type" tab (admin/content/types/add).
Next, click on "manage fields" beside the newly created content type. It's up to you how to name the field. The important thing here is to set Type to "File" and Operations to "Image."

If there are no conflicts, you'll be presented with a settings page. For the purpose of this tutorial we'll only make one change and that is checking the "Required" check box. We now have our basic but functional slide content type.
3. Resizing uploaded images
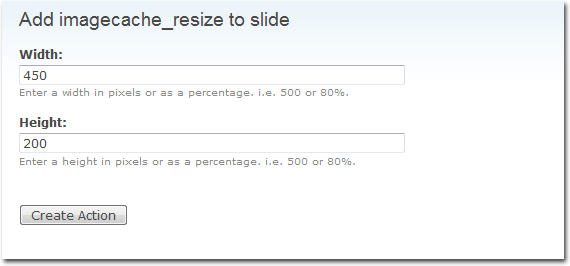
You'll most likely want to keep the image slideshow at a fixed size. Using ImageCache we can make sure our images stay consistent.
Navigate to Administer > Site Building > ImageCache and click on the "Add new preset" tab (admin/build/imagecache/add). Call it "slide" and save the preset. You will now be prompted to edit the new preset. As you can see ImageCache is a quite capable module. For now we'll only try the resize feature. Click on "Add Resize" and enter image dimensions called for by your site layout.
Notice the change in the Druplicon logo. Your new ImageCache preset is working! Click on "Save Preset."
4. Upload images
We'll need at least a couple of images to test the functionality of the slide show. Go to Create Content > Slide and create a new node with an image of your choice. Repeat the process a few times.
Now that there's some content, let's move on to the final step.
5. Creating the view
Navigate to Administer > Site building > Views and click on the "Add" tab (admin/build/views/add). Add a view of the "Node" type. You'll be presented with a page that allows to modify all aspects of a view.
Click on the plus button beside "Filters," check "Node: Type" and click "Add." You should see a list of all content types stored on the site. Make sure only the "Operator" is set to "Is one of" and "Node type" is set to "Slide." Click "Update" when done.
Now add a field in a similar fashion. Click the plus button beside "Fields" and check "Content: Slide (field_slide)." On the additional page set "Label" to "None" and "Format" to "slide image." Update the field.
So far so good. If the view's automatic live preview is enabled you should see the slides at the bottom of the page.
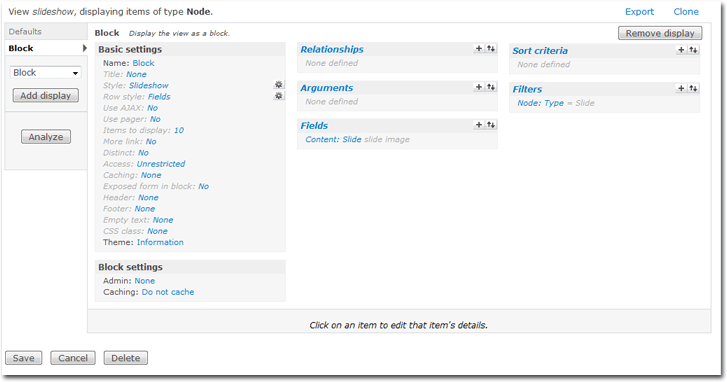
The last step in creating a Slideshow View is setting it's "Style" to "Slideshow." Under "Basic Settings" click on "Style: Unformatted" and update the setting to "Slideshow." You'll be presented with many of the slide show settings, but for now we'll go with what was set by default.
Before navigating away from the page let's a block display which will allow to display the slideshow in a block form. To do so, select "Block" in the display dropdown and click "Add display."
Done! Make sure to save the new view by clicking "Save."
6. Displaying the block
Let's enable the block that was just created by the Slideshow view. Go to Administer > Site building > Blocks and set the "Region" setting of "slideshow: Block" to "Content." Save the new layout by clicking "Save blocks."
Finally, let's make sure the Slideshow is only displayed on the front page. Click on "configure" beside the block and set "Page specific visibility settings" to "Show on only the listed pages." Under "Pages" enter "
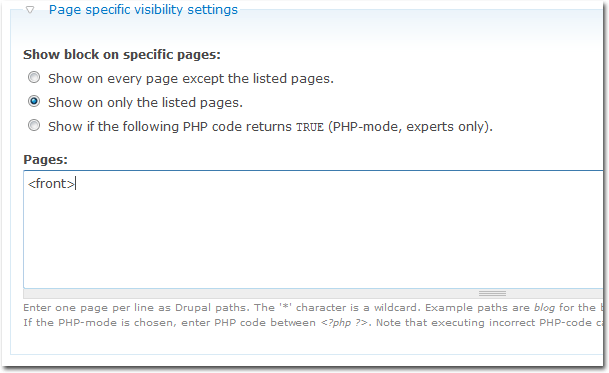
We are done! Go to the front page and you should see the uploaded images change in a slideshow fashion. Experiment by editing the view and clicking the gear icon beside "Style: Slideshow."
Good luck!